User-agent: Mediapartners-Google Disallow: User-agent: * Disallow: /search Allow: / Sitemap: http://nano7mobile.blogspot.com/sitemap.xml Nano Mobile: guide
Affichage des articles dont le libellé est guide. Afficher tous les articles

[GUIDE] Get 6h SOT! topic


Hey guys!
Thanks to my friend who has the OnePlus One with it's great battery life and his kernel settings you can get up to 6h of SOT on your G3!

It should work on every ROM and every kernel.

I'm not responsible if anything goes wrong, for me all settings worked well.
You need Root.


Ok, so now: What should you do?
You modify files under /sys/devices/system/cpu/cpufreq/
I recommend this free app, but you can use any kernel tweaker you like. https://play.google.com/store/apps/d....kerneltweaker

At first you select the "Interactive" governor.
Now we want to tweak it with the straight settings from the OnePlus One (both devices have the Snapdragon 801 processor, it should be no problem.)

Change the following:

Code:


above_hispeed_delay 20000 1400000:40000 1700000:20000

hispeed-freq 1190400

min-sample-time 40000

target-loads 85 1500000:90 1800000:70

timer-rate  30000


That's it! Now your device will run as smooth as before but the battery will definitely be better.

Thank you and feel free to share your impressions.

Paul
Will add the screenshot of the SOT later today


Attached Thumbnails


Click image for larger version<br/><br/>Name:	Screenshot_2015-01-11-19-16-58.jpg<br/>Views:	N/A<br/>Size:	181.3 KB<br/>ID:	3110157


[ROOT] [UPDATE JAN 2015] Rooting Guide for Samsung Star pro duos s7262 topic


Hi friends ,
There are lots of methods available on internet for Rooting s7262 but almost methods using outdated files and tricks which are no longer working .
Samsung released latest firmware 4.1.2 in the end of 2014 for Samsung Star Pro Duos s7262 .I am writing this post FOR ROOTING S7262 with the latest firmware 4.1.2 Installed and with the LAtest Files as on January 2015.

AIM: Rooting s7262 running latest firmware 4.1.2
Concept: We will first A :>Unlock Recovery then we will B:>FIX the WhiteScreen then we will finally C:> ROOT s7262 ! :)
Things we will need:
(every files attached at the end of post and checked before uploading)
FILE 1: PDAboot.tar.md5.zip Location: PC
FILE 2: ODIN307.zip Location: PC
FILE 3 : Superuser.zip Location: SD CARD

CHECKLIST :
1- All files downloaded from this post
2-USB drivers Installed in PC
3-USB Debugging Mode is ON ( settings>>Developer option)
4- Screen Passwords/Pattern/PIN lock disabled
PLEASE NOTE: THis process will not cause DATA Loss but it is better to have BAckup before proceeding

Instructions:
STEP 1 :
a:Put Your phone in download Mode by pressing Volume Down +Home+Power key simultaneously.
b: Press Volume UP when Warning screen appears
STEP 2:
a: Extract ODIN307.ZIP and Run Odin 307.exe as Administrator (by right click > Run As> Administrator)
b: Extract PDAboot.tar.md5.zip you will get file PDAboot.tar.md5
c: Connect Phone with PC
d:Click on PDA select[COLOR="SeaGreen)"] PDAboot.tar.md5 [/COLOR]
e: Click START !!
f: You will see message PASS !!
You have Successfully Unlocked Recovery :)

STEP 3 : (only if you see WhiteScreen after flashing)
So now you see WhiteScreen after flashing??
Dont Panic Goto this Simple Tutorial for fixing WhiteScreen Errors on s7262 : **LINK**

STEP 4 :
You should automatically rebooted in CWM touch version .if not ,reboot into recovery by Pressing Volume Up+Down+Home+Power , or By ADB Commandline (See How?)
a: Select Install ZIp
b:from SD CARD
c: select Superuser.zip
d: INSTALL !!
Congratulations You just Rooted your Samsung Star Pro s7262 :)

PRESS THANX if i helped you :)

if encountered any errors. Reply Here with full Error Message


[GUIDE] CWM & Root Lenovo Yoga 2 8/10/13 topic


Temp CWM-recovery

1. Download and put the UPDATE-SuperSU-vX.Xx.zip on internal/external SdCard
2. Download, extract the folder IntelAndroid-FBRL and put on the C drive (do not use other versions)
3. Follow this guide (Use the option T3)

Attachment 3107550

Backup & restore on the external card works well


Attached Files


File Type: 7z IntelAndroid-FBRL.7z -
[Click for QR Code]
(4.05 MB)


[Q&A] [ROOT] Tab 4 SM-T230 [GUIDE] topic


Q&A for [ROOT] Tab 4 SM-T230 [GUIDE]

Some developers prefer that questions remain separate from their main development thread to help keep things organized. Placing your question within this thread will increase its chances of being answered by a member of the community or by the developer.

Before posting, please use the forum search and read through the discussion thread for [ROOT] Tab 4 SM-T230 [GUIDE]. If you can't find an answer, post it here, being sure to give as much information as possible (firmware version, steps to reproduce, logcat if available) so that you can get help.

Thanks for understanding and for helping to keep XDA neat and tidy! :)


[Guide] Customize nokia x launcher topic


Are you stock rom user and feel bored with stock launcher.
why don't you make it more beautiful by read this little guide.

well, you can decompile Launcher.apk to edit anything you want but I won't explain this. we will use two module exposed, resflux and holo themer (root access is needed). Check this out!

-Change color tile with your own color
open resflux> go to laboratory> find Launcher> tap color and there are so many resource
What should be changed:
icon_bg_blue
icon_bg_dark_blue
icon_bg_green
icon_bg_orange
icon_bg_pink
icon_bg_purple

icon_bg_gray (setting)
folder_bg (folder)
Done, reboot

-Set background image on Launcher
open resflux> go to laboratory> find Launcher> tap color> find "Black" and make it transparent. I will use #00000001 for full transparent. Don't reboot, now move to holo themer.
Open holo themer> find Launcher> tap and change default to user wallpaper (don't choose "user wallpaper no titlebar" or you will get "Launcher has stopped"). Okay, reboot

Is it possible to use live wallpaper?

-yes, but only homescreen http://forum.xda-developers.com/show....php?t=2762794


[KITKAT ROM][PANTECH SKY VEGA R3 aka IM-A850] English Guide for a Custom ROM topic


I have translated this guide to English for people who do not understand Vietnamese

Credits: Hung Cuong Do, Shyn, Thuyduong and everyone who has made/ shared this ROM


TESTED ON PANTECH SKY VEGA R3 aka IM-A850L

Dear All,

Pantech Sky Vega A850L is a great phone at an amazing price but unfortunately most of its help on the internet is in Vietnamese language. I have this phone running on Android 4.2.2 (using this guide you can change your Stock ROM to a Custom International ROM which will remove the 80 characters SMS Limit) and I wanted to update it to Kit Kat (4.4). There are many ROMs present here for this phone. I found a KitKat based Custom ROM with good rating here and thought of trying it.


This video also helped a lot. Though its not in English but from 1 minute and 20 seconds onwards it shows how to install a Custom ROM.


Your phone must be ROOTED. Follow this guide to root Pantech Sky Vega R3 aka IM-850L.

LIST OF FILES TO BE DOWNLOADED
Firstly download these files:

ROM (Version 8 updated 27th November 2014):

Code:


https://drive.google.com/file/d/0Bw8sn5jec1C3bXJJeklVV2kzdmM/view?pli=1
OR
https://vkl.box.com/s/xsin4svte57j3kxx0cb2


Baseband File: (According to your phone's model)

Code:


A850S: Firmware MODEM_IM-A850S_S0216310 https://drive.google.com/file/d/0BxveGwot73rCTkV1amFpVHVJR1k/view
A850L: Firmware MODEM_IM-A850L_S1233310 https://drive.google.com/file/d/0BxveGwot73rCYmZlem5JbXJDQkE/view
A850K: Firmware MODEM_IM-A850K_S0837310 https://drive.google.com/file/d/0BxveGwot73rCY0dDRU5TZ2Z4MVE/view


Recovery:

Code:


https://drive.google.com/uc?id=0B8i26sLklJ_mMU5la0hlTUMycVE&export=download

Drivers Fastboot:

Code:


https://docs.google.com/file/d/0B8i26sLklJ_mMk1fRmlfcnFMcUE/edit

INSTRUCTIONS:

1. Put the ROM Zip file and the Modem File in your phone and turn on USB Debugging at Settings > USB Debugging
2. Turn off your phone
3. Press the Volume Down button + Volume Up button + Power button. Choose Fastboot by pressing Volume down and then press power to select your choice
4. In Fastboot mode, install the drivers just downloaded from the link given above. Open the “IM-A850_Recovery_All in one_06-4-2013” folder and run “Install Recovery from Fastboot.bat”. Choose Option Number 8 which will install and launch “ClockWorkMod Recovery v6.0.2.8 for Jelly Bean”
5. In CWM, its a smart move to make a nandroid backup of your phone by selecting Backup and Restore> Backup (Be sure that there is about 4GB of free space in your internal storage otherwise backup would fail.)
6. WIPE DATA/ FACTORY RESET
7.. WIPE CACHE
8. ADVANCED > WIPE DALVIK CACHE
9. MOUNTS AND STORAGE > FORMAT CACHE
10. MOUNTS AND STORAGE > FORMAT DATA
11. MOUNTS AND STORAGE > FORMAT SYSTEM
12. INSTALL ZIP FROM SD CARD > CHOOSE THE ROM(ZIP) FILE [TAKES ABOUT 3-5 MINUTES]
13. INSTALL ZIP FROM SD CARD > CHOOSE THE MODEM(ZIP) FILE
14. On the Main Menu, when you will choose “Reboot System Now”, it will ask you that Stock Recovery will be flashed and Root Access will be lost. To tackle this, simply choose “++++Go Back++++” and then a “Fix Root” option will appear. Select this option and let the phone restart.
15. On the first start up, select English as the phone language.


What is working:
1. Bluetooth
2. GPS
3. WIFI
4. Camera at 13MP
5. NFC (not tested)
6. Pakistani Network Signals working (tested on Mobilink)


Not tested yet:
1. 3G (Data is working but I am not in a 3G service area)
2. NFC

SCREENSHOTS:

KITKAT ROM SCREENSHOT-1
KITKAT ROM SCREENSHOT-2
KITKAT ROM SCREENSHOT-3
KITKAT ROM SCREENSHOT-4


[ROM] Official Cyanogenmod 12 Installing Guide topic


CM12 Official!


Guys those who have flashed Official CM12 on XT1033 couldnt get signal in it.
Problem can be solved By The following steps:


Convert the XT1033 to GPe 4.4.2(Not 4.4.4) Click Here to know how to do that.
Flash the latest TWRP recovery. Please dont use Colockworkmod recovery, it didnt work for me.. Link is here
Flash the latest CM12 from Here
Flash the Lollipop gapps from Here
Flash Donkey kernel from Here


Reboot and enjoy!!


All the above files are not mine!!
The above process worked for my XT1033 Asia Moto G
Am not responsible for anything that happens to your phone. Use at your risk
.


Guide me to root MoTo E. topic


Help me guys to root my moto e with simple steps. Please thanx in advance
...

Sent from my XT1022 using XDA Free mobile app


[Q&A] [GUIDE] Downgrade G2 (2.3.X) & DZ (2.3.X) & mT4g (2.3.4) & DHD w/ S-ON to Stoc topic


Q&A for [GUIDE] Downgrade G2 (2.3.X) & DZ (2.3.X) & mT4g (2.3.4) & DHD w/ S-ON to Stock Froyo

Some developers prefer that questions remain separate from their main development thread to help keep things organized. Placing your question within this thread will increase its chances of being answered by a member of the community or by the developer.

Before posting, please use the forum search and read through the discussion thread for [GUIDE] Downgrade G2 (2.3.X) & DZ (2.3.X) & mT4g (2.3.4) & DHD w/ S-ON to Stock Froyo. If you can't find an answer, post it here, being sure to give as much information as possible (firmware version, steps to reproduce, logcat if available) so that you can get help.

Thanks for understanding and for helping to keep XDA neat and tidy! :)


[GUIDE] How to Compile Your Own CM11/CM12/AOSP Kernel topic


Hi guys, long time no post. I have updated this guide on how to build kernels for Falcon so that anyone can learn! It's pretty simple once you get the hang of it. So yeah, here we go!


Quote:


Prerequisites:
- You must have a Linux firmware running on your computer (I suggest Builduntu because you can skip the next one [build environment setup])
- Build environment setup (Put the this in terminal and follow instructions)
- Patience and a heart willing to learn
- You need to know the languages C, C++, Java, Ruby, Python... NOT! You don't need to know ANY coding languages.

[MOTIVATIONAL SPEECH]
Truth be told, when I first started out developing, I knew NO coding languages except for HTML and a little bit of Java. Both have nothing to do with kernels! I actually learned how to do this when I suffered from a concussion. So if you really want to learn how to kernel dev and you give up halfway, just know that a 14/15 year old kid could do it..
[/MOTIVATIONAL SPEECH]


WARNING: I am not responsible for any damages to your phone or computer or pet unicorn. When you modify the wrong partitions, set too many jobs for your compiler, break your keyboard out of frustration etc., that is not anyone's fault but yours. Or your pet unicorn.


Quote:


Your Personal Handbook to the Following:
- Anything inside "CODE" boxes, type it into your terminal. If you can't find terminal, then press CTRL, ALT, t.
- If I were you, I would write these by hand instead of copying and pasting it because after a certain amount of times, you will remember the linux commands and it will be easier for you to compile more kernels for different devices
- Use this thread as a "Help Me" button. Ask for help!


Quote:


A New Beginning:
Let's start out with something simple, getting the actual code:

Code:


git clone https://github.com/cyanogenmod/android_kernel_motorola_msm8226

This could range from 3 minutes to 2 hours!

Once that's done, open up your file manager and rename the folder (should be android_kernel_motorola_msm8226) to whatever you want. I will refer it as "mykernel".


Quote:


Pokemon!
For this tutorial, we will be using a Sabermod 4.7 toolchain to compile. I WOULD teach you how to compile with 4.8+, but it creates errors that will take even longer for me to write about sooooooooo :fingers-crossed:. Now to get the toolchain:

Code:


git clone https://github.com/SaberMod/android_prebuilts_gcc_linux-x86_arm_sabermod-arm-eabi-4.7

Rename this to whatever you like, but I will be referring this as "toolchain"
Now go into you folder where the kernel source is stored...

Code:


cd mykernel


Quote:


You're Almost There!:
Time to set-up the compiler!

Code:


export CROSS_COMPILE=/home/(insert linux home name here)/toolchain/bin/arm-eabi-

This tells the toolchain that "OK, we want to make ALL this code here into a kernel".
This next line tells it that your defconfig (the toolchain's manual for compiling the kernel) that it's in the arch/arm/configs folder.

Code:


export ARCH=arm

Now to tell the it what the defconfig is!

Code:


make falcon_defconfig

Hehe, now to the hardest part of all...
MuHAHHAHAHa


Quote:


THE HARD (coding) PART
You ready for this? HERE IT IS! TIME TO BUILD THE KERNEL!

Code:


make -j4

Now sit back, relax, and watch the code! Or you could read a book, watch ****, count your fingers, play with your toes...
If you have an error during the waterfall of code, find the part where it actually says *error* (you'll probably have to scroll upwards) and search it on Google or post it here.


Quote:


THE BEST PART
If you manage to get something that says "the kernel zImage is ready" or something like that, that means you've made it!
You have officially compiled your own kernel from source! Now you need to put it in a flashable zip.
Download this file and open it up, but DON'T EXTRACT IT.
Now go to your kernel source then "CTRL + F" and search for "zimage-dtb".
Find it and put it in the "kernel" folder of "FalconKernel - Signed.zip". Then "CTRL + F" and search ".ko".
Copy radio-iris-transport.ko and put it in the system/lib/modules (not pronto) of the zip.
Then find wlan.ko and rename it to pronto_wlan.ko. Copy and paste it in system/lib/modules/pronto of the zip.


Now you can put it on your phone and flash it!


[Q&A] [GUIDE] how to fix low audio in custom rom topic


Q&A for [GUIDE] how to fix low audio in custom rom

Some developers prefer that questions remain separate from their main development thread to help keep things organized. Placing your question within this thread will increase its chances of being answered by a member of the community or by the developer.

Before posting, please use the forum search and read through the discussion thread for [GUIDE] how to fix low audio in custom rom. If you can't find an answer, post it here, being sure to give as much information as possible (firmware version, steps to reproduce, logcat if available) so that you can get help.

Thanks for understanding and for helping to keep XDA neat and tidy! :)


[GUIDE] Determine a Fire TV's software version via the Serial Number topic


Thanks to everyone that submitted their Fire TV serial number information. Please continue to submit your information as you purchase new units so that I can keep the correlation between the Fire TV's serial number and the default software version accurate. I don't want to have to keep updating the information in two places, so go here to see how to determine a Fire TV's software version and rootability via the Serial Number:
AFTVnews.com/serial


[Q] Can't find the ZIP in stock JB recovery (rooting guide) topic


I have a Galaxy Ace 2 (I8160XXMF2) and I'm following this guide here and I just want to root and install CM because stock JB is so slow.

Problem is after copying the file to the SD card (or even external SD card) the zip file cannot be found using the stock recovery. I can only find some empty folders in the stock recovery.

I hope you can help me out with this. Thanks!


[Guide] Sprint Htc One | HBOOT 1.57 | Works with AT&T topic


First off, I had absolutely no luck with any of the other methods mentioned on the forum, so I decided to write up how I (finally) managed to get my HTC one to work with an AT&T GoPhone sim card.

1.) Get Sunshine for S-Off, I wasted 3 days trying to find a way around paying for it, but finally caved.
2.) SuperCID: fastboot oem writecid 11111111
3.) Flash the RUU from this guide: http://forum.xda-developers.com/show....php?t=2586704 or here: http://click.xda-developers.com/api/...651.10_RUU.zip
- I had to fastboot oem rebootRUU then fastboot flash zip RUU.zip
- Check to be sure HBOOT is downgraded to 1.44
4.) Be sure to root the device, either using custom recovery or TWRP app from play store
5.) Run the sim unlock helper available here: http://forum.xda-developers.com/atta...5&d=1414183159
6.) Here's the one part that isn't widely mentioned for the specific issue I ran into with this unlock: You need a sprint sim card to "trick" the phone into searching for networks.
- Type in *#*#INFO#*#* (*#*#4636#*#*) and change your network to WCDMA preferred
- Be sure that the Sprint sim card is in the phone
- Go to Settings -> Mobile Data -> Network Mode and set to GSM/UMTS Only (You should have no signal or bars with X above them)
- Click on Available GSM networks -> Select Automatically
- Switch the SIM for the AT&T Sim (It will show 'no sim warning') while it is searching and then click on Available GSM networks -> Search networks
- Select AT&T (or Maritime)
- Device will register, however, the settings are lost on restart and I haven't managed to get data yet. (If anyone can help with this, I'd greatly appreciate it!)


[GUIDE] Free internet on Airtel network using Droid VPN. topic


Hi guyz,
Today I'll teach u to get free internet using Droid VPN.
First download : droidvpn . com
Install and open the app.
After doing that u vl b asked to enter ur email and password .
But this is not the general email n password .
U have to register a free account.
By clicking Register button.
After registering open the app and just enter the email id n password that u will receive on ur email after completing registration.
Now click the settings button.

Set connection type to TCP

Now click HTTP headers and enable it then
In the custom HTTP haeders type

Host:/203.115.112.5/-X-Online-Host:/203.115.112.5/


Save all done.

Now connect using any free server.


Maintain 0 balance.

Enjoy..


The X-Man:eek::eek::eek::eek::eek:


[Guide] [4.0+] Native Android samples, 14+, with focus on Lollipop and Material topic


Native Android samples for beginners and experienced, 14+, with focus on Lollipop and Material.

The project covers the following so far:
  • Toolbar

  • Drawer (following the updated Material Design Guidelines)

  • Volley (with forced caching option, it caches regardless of server response headers, Memory and Disk)

  • Download images using volley (with Memory and Disk caching)

  • Json (using Gson)

  • ListView with a custom Adapter (based on BaseAdapter)

  • SwipeToReferesh (using SwipeRefreshLayout)

  • Endless Adapter (using a custom OnScrollListener)

  • Fragment (ListFragment and Fragment)

  • Headless Fragment (maintain data on config changed)

  • Landscape, 7'' and 10'' tablets specific layouts

  • Custom Views

  • Palette

  • Themes

  • Styles

  • Gradle

  • Gradle product flavors

  • Espresso tests

  • Travis CI, Continuous Deployment

GitHub: https://github.com/MostafaGazar/soas

AndroidArsenal
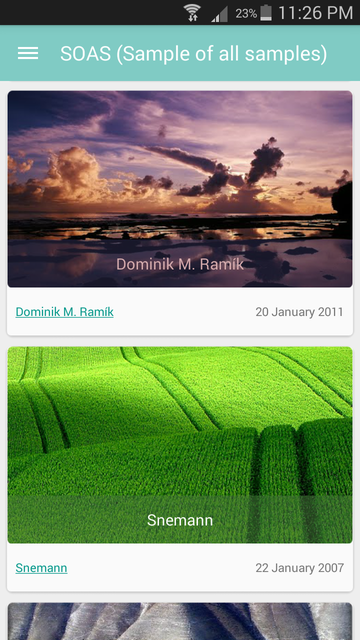
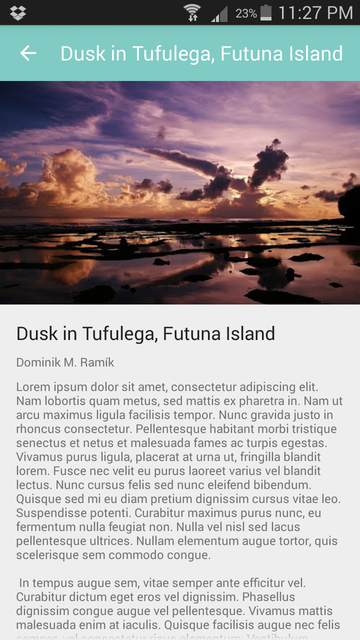
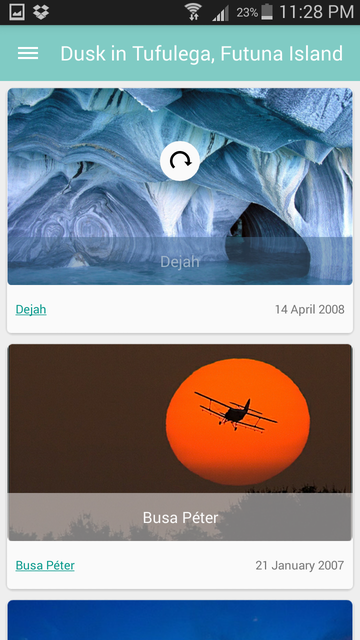
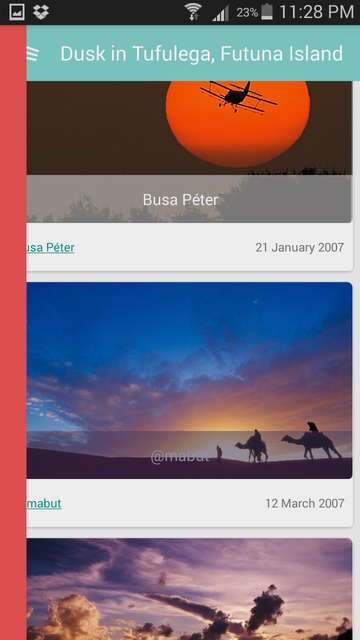
Screenshots:
p1
p2
p3
p4
p5

Useful materials (To start developing for native Android or update your knowledge):Notes:
pFragment
pService
pConcurrency

GitHub: https://github.com/MostafaGazar/soas


[MOD] [GUIDE] Add Custom Font(s) To Any App topic


Hello XDA,

This guide will show you how to add a custom font to any string of text, in any app. When done right, it can really enhance the look of any theme. For the purposes of this guide, I'm going to assume you already have the tools and basic knowledge required to decompile, modify, and recompile apk files. If not, there are plenty of threads on XDA that will teach you how.

**** Before proceeding, MAKE A BACKUP ****
**** I am not responsible for any loss of data, bricked devices, your wife leaving you, or any other consequences that may arise as a result of this mod. ****


  1. First, download and extract the attached zip file. The included .ttf is for example purposes, and can be replaced with any font you choose.

  2. Next, decompile whatever apk you want to use your font in. For this guide, I will be using SystemUI.

  3. In your decompiled apk folder, place your .ttf file in the 'assets' folder. If there is no 'assets' folder, create one.

  4. Move the included .smali file into you app's 'smali' folder. The exact location shouldn't really matter, just make a note of what that location is. In my SystemUI example, I have placed it in com/android/systemui/.

    *** NOTE: The .smali file I've included is named 'WurlyTextView' because the font it uses is called 'Wurly Fool'. ***
    *** While not necessary, I would highly recommend renaming the smali file to something more indicative ***
    *** of the font you are using, just to keep things less confusing for yourself. ***


  5. After you have moved and renamed the .smali file, open it in Notepad++ and look at the first line:

    Code:


    .class public Lcom/android/systemui/WurlyTextView;

    If you are using this mod in any apk other than SystemUI, you will need to change the path. For instance, if you were working in SecMms, the path would be:

    Code:


    .class public Lcom/android/mms/WurlyTextView;

    In Notepad++, open the find dialogue (ctrl+f), and search for "Lcom/android/systemui/" and replace every instance with the path from your apk.


  6. Next, assuming you renamed the .smali to something more descriptive of your font, search for:

    Code:


    WurlyTextView

    And again, replace every instance with whatever you renamed the .smali to. Be sure to watch the capitalization, as it is important.

  7. Now, search again, this time for:

    Code:


    wurly.ttf

    There should be three instances of it. Change all three to the file name of the font you placed in the 'assets' folder.

    *** NOTE: If there is a space in the file name of your font, be sure to right-click it, ***
    *** look at it's properties, and see what the file name is there, as it will probably not ***
    *** include the space, or anything after it. This is the file name you want to use. ***


  8. Search the .smali file one more time, this time for:

    Code:


    wurly_fool

    Replace every instance with something descriptive of your font. Note that whatever you change it to must be all lowercase.

    *** NOTE: This step is only necessary if you are adding more than one custom font. ***
    *** If you are only using one font, this may be left as "wurly_fool", regardless of your font's name. ***

  9. Close your .smali file, saving changes, and navigate to your decompiled apk's res/layout folder.

  10. Locate and open the layout that points to the string you want your new font to be used on. For example, if you want to change the text that says "No Recent Apps" when you long-press the Home button, you would open /res/layout/tw_status_bar_no_recent_apps.

  11. Within that layout file, locate the line pointing to the string you want to change, and replace:

    Code:


    <TextView

    with the path and name of your .smali file. For example:

    Code:


    com.android.systemui.WurlyTextView

    *** NOTE: Be sure to pay attention to the capitalization here, as it is important ***


  12. Finally, close your layout xml, saving changes, recompile your app, push to your phone, set permissions, reboot, and enjoy!


Attached Files


File Type: zip Custom Font Files.zip -
[Click for QR Code]
(23.6 KB)


[Q] Upgrading Amazon fire TV from Gotham to kodi guide? topic


I've been looking for an actual guide or directions on how to update your Amazon fire TV from Gotham to kodi. I don't know if it's just an easy step or if there's something involved. Can someone help me on how to actually update XBMC to kodi. It would be greatly appreciated and I'm sure others would like it to.


[Guide] Most Problems and Info's that you must Know about ADB and Fastboot topic


Tips & Guides About Moto G 2014 ADB and FastBoot

The most of people have problems with fastboot and ADB. Here will explain some tips and guides.

- Do u know can use ADB in recovery mode?
Yeah if u have bricked your phone or deleted system or can't put the Debug Mode have a alternative. This happens the Device ADB have two modes. The USB mode and Debugging Mode, using two different drivers. When you download Motorola Device Manager he installs the Debugging Drivers. In Motorola is really hard obtain the correct drivers.

- Can I flash zips with fastboot?
Yeah but isn't recommended the people try that:
- fastboot flash zip myzip.zip
This is incorrect he will try to flash a .IMG in a partition called zip.
- fastboot -I flash system myzip.zip
This is incorrect. When you download a ROM backup to flash in Recovery he have some partitions making that will create a partition into a partition. Bricking your device.
The correct way to flash ROM is in recovery.

- I can't transfer file on my device.. Can I flash?
Yes using two methods
- ADB push
You push to your device a .zip with the Rom eg.:
- adb push my file.zip /sdcard or /sdcard1
This will push your file to the device and you can after that flash in recovery.
Is normal after digit the command nothing happens. Differently fastboot the ADB doesn't shows progress of transfer.
- ADB side load
You can flash sideload the zip
Using adb sideload myzip.zip
Must enable sideload mode on your recovery.

- my device doesn't appear on the list.
When you are on boot loader mode the ADB doesn't runs. Only in recovery mode or system mode.
Most times you have incorrect drivers. But if u are on recovery mode try that on cmd:
adb kill-server
adb usb
This will enter the daemon service in USB mode.

- can I reboot my device in recovery? Yes, adb reboot recovery

- can I wipe my firmware with fastboot? Yes, using these cmds.
fastboot erase userdata
fastboot erase cache

- can I get my device info?
Yes with ADB.
adb get-imei
adb get-serialno
adb get-deviceno

If u have more questions write here. I will add on OP.

Downloads:
- Moto G drivers: https://mega.co.nz/#!IY0mUBDL!tukY40...fhG-bfG0oIvEa8
- Minimal (really minimal) ADB & fastboot: https://mega.co.nz/#!NJUVlIwI!uiRi4U...WIWeMElUcMD4e0